2 Understanding the Genesis Preferences
2.2 User
This part of the interface allows you to add multiple users to the Genesis system. This allows each user to have their own configuration, essential for configuring Microdot-II and other programs requiring user information.
When you first start the Genesis Preferences you will see a system operator listed within the users list. This 'system operator' controls the other user within the list. For instance, the system operator has to confirm changes to the details of other users.
We advise you to edit the system operator immediately and add a password. Once this password is set it must be remembered in order to add other users, amend their settings and so forth.
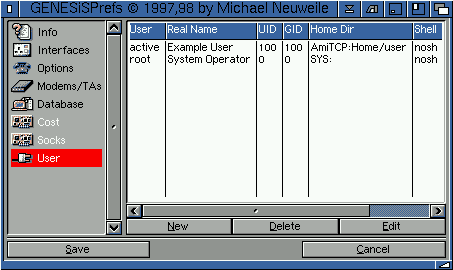
Each user can have their own password. This password allows that user, and only that user to log onto the system. For instance, in the example image below, if user 'root' (the system operator) created a password such as 'testpass1', and user 'active' tried to logon as user 'root', active wouldn't succeed unless he knew the password than user 'root' had set.

Note that you can drag the users within this list. In the above example, if you dragged user 'active' to the top of the list, this would be the first user you see listed within the Genesis status window when you start Genesis. This would allow you to select 'active', if this is the user used most often.
To move the users around within the list, simply click on the user then, using the left mouse button, hold and drag and then drop to the new location.
To create a new user simply click on the "New" button. The "Edit" button allows you to edit an old/existing user and, of course, the "Delete" button deletes an old/existing user.
2.21 General
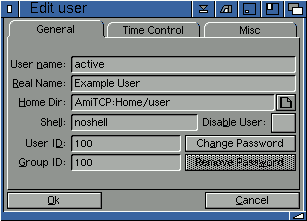
Assuming you have clicked "New" or "Edit" you will see the following interface:

For example: say you entered the user "mike" and you were connected to Demon Internet in the uk. When you use AmIRC online, you will be seen as mike@hostname.demon.co.uk.
Remember you cannot change the username of the 'system operator', this is fixed. You must create additional or new users.
Note: that the user you create is also used within Microdot-II and the Contact Manager to create your mail account and configuration. For instance, if I log in as user 'active' and then send a URL from Voyager to the Contact Manager, this URL will be added to active's configuration within the Contact Manager.
You can enter your password in this box, making sure it is entered twice to "verify" you have entered a correct password. Make sure the password is more than six digits and contains a numerical figure.
Remember that your password will be required if you try to run the Contact Manager or Microdot-II offline. ie. you will be required to 'log-in' as a user and, if a password has been set within the Genesis Prefs, you will be required to enter this before you can log-in as this user.
2.22 Time Control
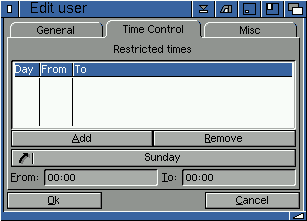
This section allows the system operator to create time restrictions on when a user can connect to the Internet. For instance, the system operator might be a parent who doesn't want their children to use the net during weekday periods, due to phone costs.

To add time restrictions, simply press 'add' and then add the time restrictions per day. Remember that time limitations use the 24-hour clock. For instance, if you wanted to add a restriction to prevent access on a Monday, between 9am and 6pm, you would enter:
Monday 09:00 18:00
If you wanted to add more than one time restriction per day, simply add more time limitations for that day. ie. you could add two time limits for a Monday.
2.23 Misc
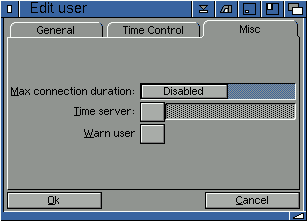
This section allows the system operator to set a maximum connection limit and to set other functions.

The format for the time server should look similar to 'time.isp.co.uk'. Some universities have a time server as do many ISP's.
Go to the previous, next, chapter, table of contents.